

About Zoom
The necessary equipment
and setup for
SIS online lessons
SIS online lessons use the video conferencing software "Zoom".
![]()
Zoom is software used all over the world that allows users to hold meetings for free anywhere.
Why use Zoom for SIS online lessons?
-

Connect with one click
You can connect automatically by clicking on the URL sent to you without having to register or create an account like with Skype. You can connect automatically by clicking on the URL sent to you.
-

Can record with one click
If you missed the instructor's explanation, want to review, or just lost connection, this feature will let you revise the lesson
-

Connect from your smartphone
You need to install the free Zoom app, but you can easily connect from your smartphone. The data communication charges are small, so the connection is stable, and the communication charges are not so high, so you can use it easily.
-

Free and easy! Including various functions
Not only is it simple and easy to use, but it also comes with many features such as video capabilities, screen and whiteboard sharing, and more.
Using ZOOM
When you reserve a lesson, the instructor will send you an e-mail with a participation URL that you will use during the lesson.
When using a computer
-
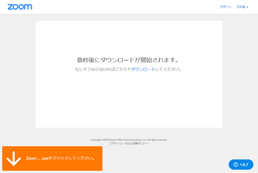
Download Start
When it is time for the meeting, click the URL in the email you received. If the download does not start automatically, click ""Download"".
-
App Installation
The first time you use Zoom, the app will be installed automatically. *It takes 1-2 minutes
From the second time, the installed application will start automatically. When Zoom starts up, the screen "Join audio by computer" will appear in the center of the screen, so click the blue part. When you click the blue button, the mark at the bottom left of the screen changes from headphones to microphone.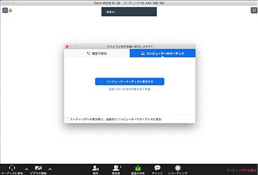
-
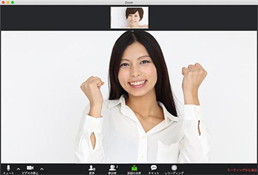
Lesson Start
When the lower left mark becomes a microphone mark, you have entered the room. Try speaking out loud and see if the blue meter in the microphone symbol moves.
Participating from a smartphone or tablet
-
App installation
If you want to participate on a computer, please download the Zoom app in advance. You do not need to install , but install it in advance when using a smartphone or tablet for the first time. Please open the store and install an app called “Zoom Cloud Meeting” in advance.
*Google Play for Android devices and App Store for iPhones. After installation, tap "Open" to open the app.
-
To start the course
1. After making a reservation for a course, please see the course details page.
2. Check the date and time of the course on the course details page.
There is a blue button that says "Enter Zoom".When it's time for the lecture, press the button to participate.You can now enter the Zoom room.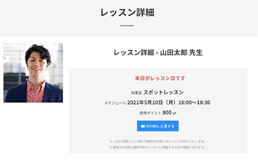
How to use Zoom
-
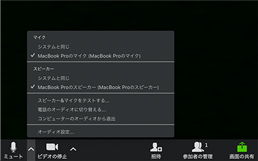
Mic ON/OFF
Look at the microphone icon in the lower left corner of the Zoom screen. When the microphone is properly connected, the blue meter will move up and down with your voice as you speak. If the blue meter does not move when you speak, click on the right side of the microphone symbol to bring up a list and check if the microphone you are using is selected correctly. To mute the microphone, click on the microphone symbol. When the red diagonal line appears, the microphone is muted. Click again to unmute the microphone.
-
Camera ON/OFF
Among the icons at the bottom of the Zoom screen, the second icon from the left is the camera icon.
The "Camera OFF" state will appear and the screen will display icons.If you click the camera icon again, "Camera ON" and your face will appear on the screen.If the camera does not appear correctly, click on the symbol to the right of the camera icon. A list will appear, make sure the camera you are using is correctly selected.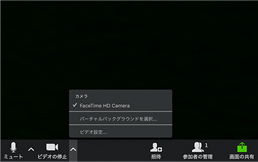
-
Changing name
Your name will be displayed in the lower left corner of the part where your face is shown.
You can change the displayed name. First, move the cursor to the screen where you are reflected
Click (Right-click for Windows) Select "Rename" in the menu that appears,A pop-up will appear, so enter the name you want to change there. Even if you click on a screen with an older version of the app, the menu may not be displayed due to reasons such as . In that case, use the following method.Please change the name.
Click “Participants” among the icons lined up at the bottom of the Zoom screen to display the participant list on the right.Look for your name in it. Find your name and hover over it to see "Name Change" button will appear, click it to change the name.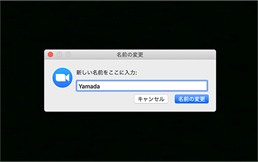
-
Change of view
Zoom has two views, which you can switch between.
Gallery view: A view in which all participants' faces are displayed at the same size
Speaker View: A view that automatically selects and enlarges the person speaking
Check that the display in the upper right of the screen is set to "Speaker View".
If it is in "Gallery View", click it to switch to Speaker View.
When you're in speaker view, you may want to fix the person being magnified.
Click on the screen of the person you want to lock the enlarged display
(Right-click in Windows) and select "Pin Video" from the displayed menu to pin it.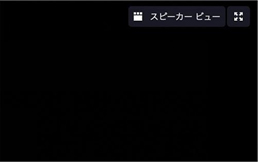
-
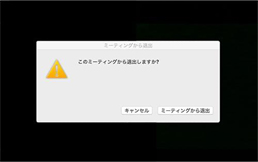
Exiting the room
To leave the Zoom room, click "Leave" at the bottom right. A pop-up will appear, so You can leave the room by clicking the button labeled "Leave meeting".
-
Update to latest version
Update from the Zoom app on your PC. Launch the Zoom application and click on the name icon on the right side of the search bar (if you have set a profile picture for your account, that picture will be displayed), and a menu will appear.
Click ""Check for Updates"" to start checking for the latest version and the following screen will appear."
After a while, the download is completed and if there is the latest version, "Changes available" is displayed as shown below.
To see what new features are available, click "New Features" to see the updated details
To update Click "Update Now" and check the contents. The latest version will be installed. "Check for Updates..." again to see if it has been downloaded.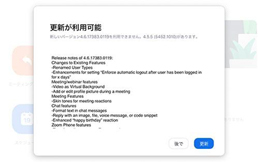
-
Zoom screen sharing
The computer screen can be displayed to both the member and the lecturer. Discuss while looking at the same material It is convenient to write comments on the material.Here, we will introduce how to share files and whiteboard screens, and how to add comments.
-
file sharing
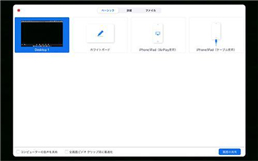
1. "Share screen" in the operation menu displayed at the bottom of the screen button. Open the file you want to share in advance.
2. Select the file you want to share and click "Share screen" at the bottom right press the button. You can select the files you want to share.
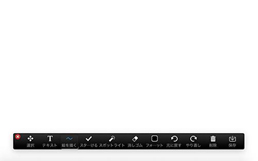
3. To add a comment, press the "Add comment" button on the comment toolbar.Stop sharing your screen with "Stop sharing".
-
Share a whiteboard
Press the "Share screen" button on the operation menu and select "Whiteboard".
-
Add a comment
You can write comments on the shared screen. Your comments will be visible to members and instructors.
1. Press the lower triangle next to Show Options at the top.
2. Select "Comment" in the menu that appears.
3. The comment toolbar will appear and you will be able to write on the screen.
-
Record
Click “Recording” and select “Recording on this computer”.is displayed, and "Pause/Stop" is displayed below.
When you end the meeting, the recorded video will automatically appear.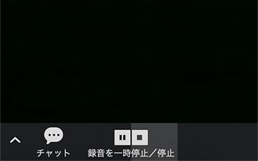
Contact us
For SIS Academy inquiries, please email us!
online@sis-ac.com
〒658-0053 兵庫県神戸市東灘区住吉宮町2丁目21-8
休日/日曜日・祝日・年末年始
TEL/078-822-6620 FAX/078-822-6621
【Address】
2-21-8 Sumiyoshi Miyamachi, Higashinada-ku, Kobe-shi, Hyogo, 658-0053, Japan
【Holidays】
Sundays, national holidays, end of the year and New Year holidays